Wednesday, July 25, 2012

A Walk Down Contest Memory Lane

So for those of you who follow my Facebook page this is nothing new but they are some of my favorites so I thought I would share them here. A little over a year ago with the encouragement of my bestie I entered my first Facebook makeup contest and I was officially addicted. I found myself entering every single contest no matter what the theme was. It was such a great way for me to meet some truly amazing people but to also really push myself as an artist. Plus with all of the prize packages that I started receiving checking the mail had never been so fun. Sadly I find myself rarely having the time to enter anything these days but they are still fun to look back on.

Sugarpill Inspired
Angels vs. Demons
Pink & Black Hello Kitty
Disney Princess (Snow White)
Music Icon (Lady Gaga)
Masquerade Ball
Masquerade Ball
American Flag
Masquerade Ball
Dramatic Peacock
Drag Queen
Recreate Marylin Monroe Zombie Tattoo
Chaos
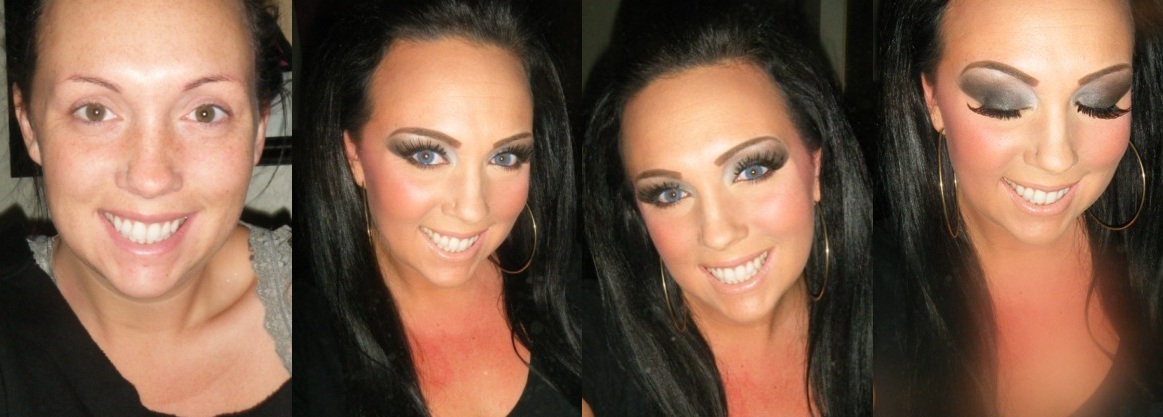
Before & After

Friday, July 20, 2012

I Cry Glitter

Its been awhile since I played with my makeup and created a look on myself just for fun. I was feeling very inspired the other night at 1:00 am and I thought that I would share the results with all of you.

I used Pretty Addictions neon pink (limited addition and I will totally cry when I run out of this), Cobblestone Pub (from the limited addition St. Patrick's Day collection) and Pina Colada (I use this color to high light my tear duct pretty much everyday).
I also used Sugarpill loose eyeshadow in Tiara and CatEye False Lashes.

I loved this look and seriously did not want to wash it off. Hope you like it too!

Thursday, July 19, 2012

Soft Romantic, Smokey, Colorful Summer Eyes


So a few days ago I had bragged on my Facebook page about how I had just made my newest favorite makeup purchase and that I was going to blog about it. Well I have been so busy that I actually completely forgot until I was reminded last night. 

I was at the mall with my daughter and cannot not go into Sephora. Every time I tell myself that I am just going in to look but that rarely happens. I mainly just wanted to check out the Smashbox BB cream (which I am actually really loving) but while I was walking down the aisle there was what I think just might be the most beautiful palette I have ever seen. It was the Smashbox Shades of Fame Palette. This is a limited edition palette for summer 2012 that I am not sure how I have not seen already.  The shadows in this collection are like my dream come true. Seriously if someone had asked me to put all of my favorite colors for summer together this is exactly what it would have looked like. Every color is gorgeous but sherbert and pacific are to die for.

Included are:
9 vibrant shadows
BLISS (pale golden beige)
HONEY (soft translucent yellow/pink)
SANDSTONE (soft sandy beige)
NUDE (matte soft caramel)
SHERBERT (shimmery coral)
SAFARI (deep golden green)
PACIFIC (shimmery aqua)
PRALINE (bronzed)
MOCHA (toasted brown with gold flecks)

2 luxe cream liners
GOLD
BRONZE

Double ended brush (shado brush on one end and flat liner brush on the other)
Photo Finish Lid Primer (mini size)

When I find something I love this much it is always such a hard decision for me if I want to keep it all to myself or add it to my pro kit. I had a photo shoot the following day and the theme was soft romantic so I already knew this palette was coming with me. Here is a look that I created on one of the beautiful models using Bliss, Honey, Praline and Mocha. 

Photo by Leann Holtsman
Model: Reanna Petroski

This is limited edition so I am not sure how much longer it will be for sale but it retails for $48.00 and is available at Sephora or Smashbox.com

Oh and for you lovely readers of my blog if you order from Smashbox.com use the code FAME2010 to get a free photo finish luminizing foundation primer with any order before 10/31/2012.

Wednesday, July 18, 2012

GIVEAWAY!!


Remember my post about Stella StarishCosmetics and the mini makeup picture tutorial that I did? If you missed it check it out ... HERE. Well how would you like to win all 5 full sized eye shadows and a NYX Jumbo Eye Pencil in Milk so that you can recreate the look yourself?
All you have to do is SUBSCRIBE and leave me a comment on this post telling me what you think about my blog. Do you love it, hate it, anything you would like to see different.
Winner will be chosen at random on August 1st so that gives you two whole weeks to enter.
Good Luck <3 


Kiss & Makeup Necklace


I am so excited about this, I have officially become a walking Kiss & Makeup advertizement! A couple of months ago I decided that I could not live without a Kiss & Makeup necklace. I started my search by looking on Etsy for someone who could create a custom laser cut acrylic necklace for me. I sent a message to Essem Designs and got a super quick response from her that made me feel like she was just as excited as I was. We emailed back and forth a couple of times about the look that I wanted and I told her that I trusted her to create something amazing for me. When I received it in the mail I was even happier with it than I ever imagined I could be. It was so glittery and she had even used a kiss mark in the design. Overall great packaging and great product.  
Check out her Facebook Page and her EtsyStore. I highly recommend her!


Want your own custom necklace? For the rest of July use code XMASJULY25 in her online shop for 25% off EVERYTHING <3

Wednesday, July 11, 2012

imPRESS Press On Manicure


I recently received this product complimentary to test from influenster and was actually really excited. I am not typically much of a "fake" nail kinda girl and have not worn press on nails since I was a kid but had seen the the commercials staring Nicole Scherzinger and was defiantly curious. The first thing that caught my eye were all of the different and totally cute patterns. I mean seriously look at these:
photos from imPRESS

Those are just a few of my favorites but there are 36 different colors and patterns to choose from including trendy brights, classic darks and animal prints. I received mine in the color stiletto which is a shade of brown that I personally would not wear but still had to try these out. I started by sizing each nail and laying them out in order. Then all I had to do was a simple swipe of the cleaning pad that is included in the package and then just peel and stick. It seriously took me under a minute to apply a full set and they felt very secure like I could go out and not worry about loosing a nail.
These did look a little too fake for me and I'm sure would not seem long to most people but just felt a little too long and square. 
They advertize that they will last up to a week which is pretty amazing. I only left mine on around the house for the night and them removed them. I placed a polish remover soaked cotton ball on each nail for a few seconds and they peeled off easily without any damage to my nails.
Overall I cant see myself wearing these very often but I think they would be amazing for photo shoots, Halloween or any occasion when I don't have time for a mani. I think if I tried them again in a color or pattern that is a little bit more my style and file them down shorter that I will really like them.


Where to Buy

You can find imPress Manicure at CVS, Rite Aid, Duane Reade, KMart, Walgreens, Walmart and more. For a full list of online and in-store retailers, visit imPressManicure.com, where you can download an exclusive coupon and virtually try on all the colors and patterns!
Suggested retail price: $5.99 for colors and $7.99 for patterns


Stella Starish Cosmetics


Warning: This is going to be long and by long yes I do mean even longer than my last post :)
Several days ago I opened up my mailbox and saw the most beautiful metallic pink package I have ever seen. It was sent to me by the wonderful Miss. Stella of Stella Starish Cosmetics. <--- Click the link to check out her website! Honestly opening it seriously felt like Christmas in July.  Inside was the cutest Hello Kitty card with a handwritten message and a P.S. that said she had included some goodies for my daughter. Now anyone who knows me knows that I have an eight year old named Alyssa who is basically my clone. We act alike, talk alike and in our free time play with makeup. Stella had sent her some adorable nail decals and some candy. This not only made Alyssa’s day but to me shows how caring and sweet Stella is.
Now for my goodies! She sent me a pair of lashes, nail decals and a metallic silver drawstring bag filled 13 eye shadows in every color from pinks to blues to yellows to greens. She did a wonderful job choosing them for me because they are all colors that I would have picked myself.  The shadows come in 5 gram sifter jars with a gold Stella Starish label on top. Each one is shrink wrapped and even has a sifter seal sticker so you know for sure that you will receive them in perfect condition without losing any product.  I quickly opened and swatched them and then spent the next several minutes just staring at the beautiful, sparkly, pigmented colors on my arm. I was so anxious to try them that I decided to do a look right then. 


Since I am now the proud new owner of this blog I thought I would try doing a little pictorial to go with my look. I hope that it is helpful and I would absolutely love to hear your feedback. Is this even helpful? Is it something you would like me to do again? I would also LOVE to see pictures if any of you try this out. Oh and a huge thank you to my favorite 8 year old Alyssa for her being my photographer!

For my eyes I used:

NYX Jumbo Eye Pencil in Milk

Urban Decay eye shadow in Foxy (in the Naked2 palette)

Stella Starish eye shadow in Dew

Stella Starish eye shadow in Eros

Stella Starish eye shadow in Humera

Stella Starish eye shadow in Big Dipper

Makeup Forever waterproof eyeliner in black

Ardell lashes in wispies

Red Cherry lashes in W004

DUO waterproof lash glue

For my lips I used:

MAC Pretty Please lipstick
Stella Starish eye shadow in Circinus

Start by applying the NYX Jumbo Eye Pencil in Milk all over your eye from lash line to brow (consternating more on your lip and blending up) using a small, flat synthetic brush. If  this creases at all while working you can always just blend it again with your brush.
Using a fluffy shadow brush apply a matte nude shadow like Urban Decay Foxy all over from your crease to your brow.
Using a small flat shadow brush apply a white shadow like Stella Starish Dew in the inner corner to almost halfway across your lid making sure to not go above your crease. Use a patting motion to really pack on the color and allow it to stick to the NYX base you applied just make sure to tap off your brush to avoid too much fallout under your eyes.
Using that same small flat shadow brush and same patting motion apply a bright pink like Stella Starish Eros on the other half of your eye.
Now use a fluffy blending brush (my all time must have favorite it the MAC 224)and that same bright pink shadow and blend it up into your crease. Also blend the line in between the pink and white shadow on your lid.
Now use that same fluffy blending brush (you can just wipe it on a paper towel to clean the pink off) and apply a orange shadow like Stella Starish Humera from your tear duct to your brow. I love adding a little pop of color like in this spot. Just make sure it is a color that will open and brighten your eyes. My favorites are yellow, white and orange.
Clean off your blending brush again and apply the same white shadow you used earlier to lightly highlight under your brow. Since this is the final color that you will apply its always good to stop, take a step back and take a look at both eyes to make sure they are even and blended. If not you can add more color or use your clean blending brush to blend the colors together more. Things have a tendency to look a little different when you take a step back so I always do this when doing makeup on myself or a client.
For this look I created a very clean straight line. There are a couple different ways people do this like applying a piece of tape to each eye before you start or doing your eye makeup before your face and cleaning it up with a makeup wipe. I like to just clean it up with some concealer. I take a flat concealer brush and my under eye concealer (a shade lighter than my skin) and literally just draw a line from the bottom corner of my eye to the end of my brow. Then I use my finger to blend the concealer down into my foundation. This method is fast and easy and I like the way the lighter concealer shade creates a clean high contrast line next to the colorful shadows. Its kinda like a makeup magic eraser.

Then fill in your brows and apply liner to the top and bottom lash lines winging it out on the sides and creating a small point in your inner eye.
Now use a small pencil brush and a bright blue shadow like Stella Starish Big Dipper and apply it to your lower lash line on top on the black liner (applying it on top of the liner will help to soften the line but you will still have the definition from it). I also like to bring the blue up under the wing of my liner.
Now apply some mascara and lashes
For your lip use a shimmery nude like MAC Pretty Please and blend it with a shimmery light shadow like Stella Starish Circinus.